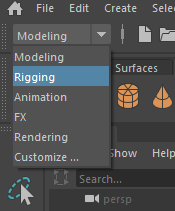
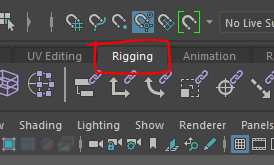
In this worksheet we are going to cover the fundamental concepts of manually rigging a character.
We will cover creating a skeleton and forward kinematic controller.
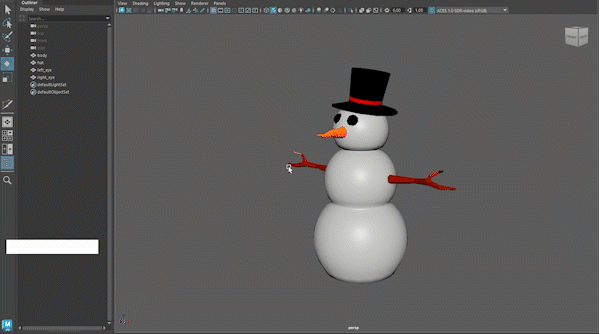
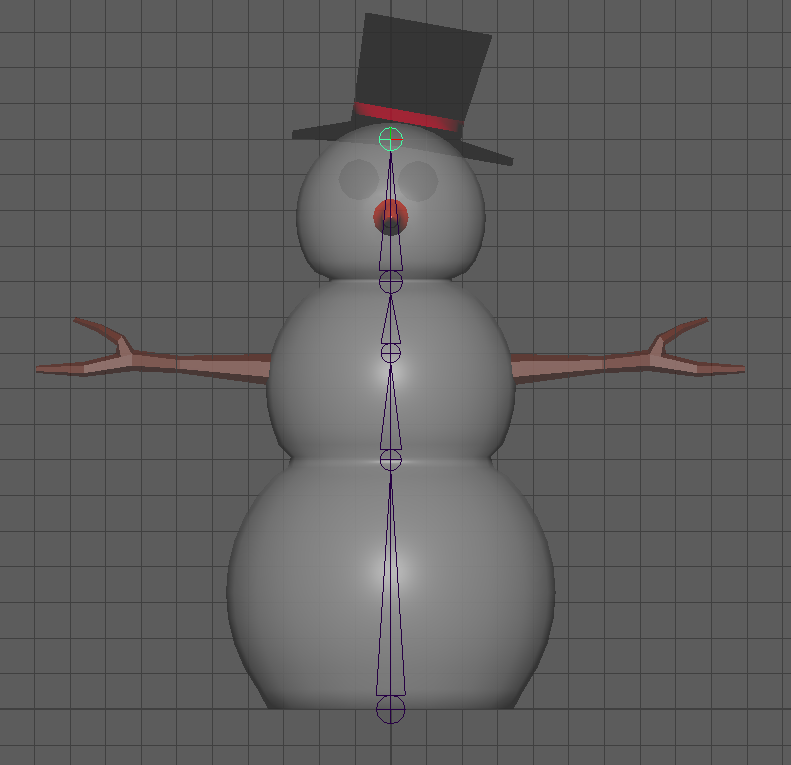
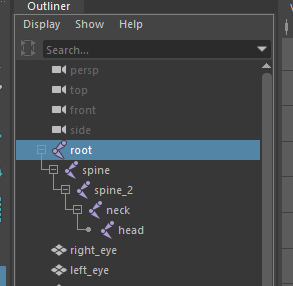
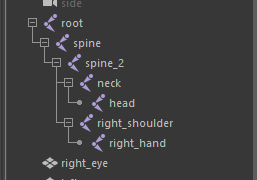
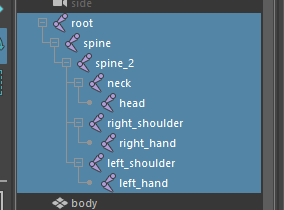
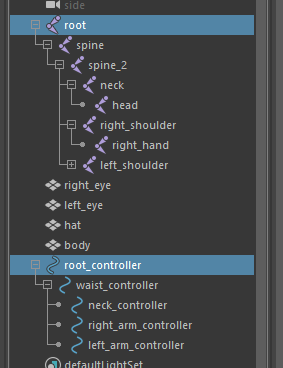
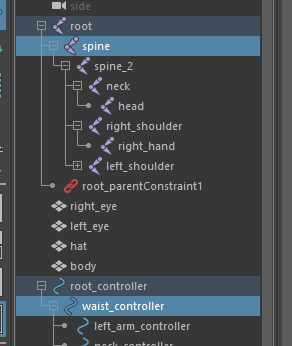
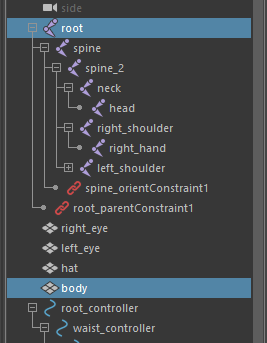
In the Outliner, open up all the joints by pressing the + symbol
Rename all the joints by double clicking on them, this is really important and will help you later.
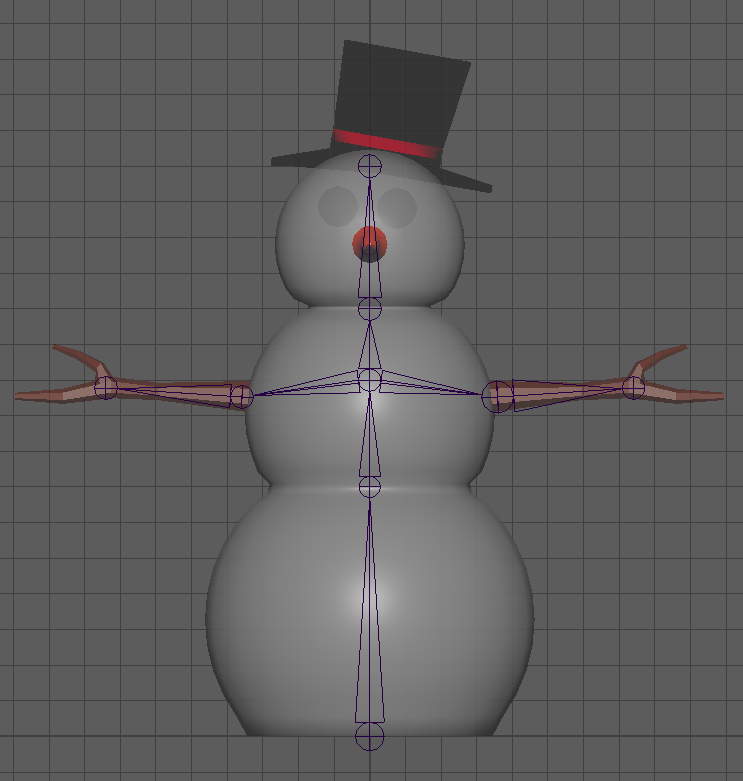
Go back into the perspective view (HINT:tap the space bar)
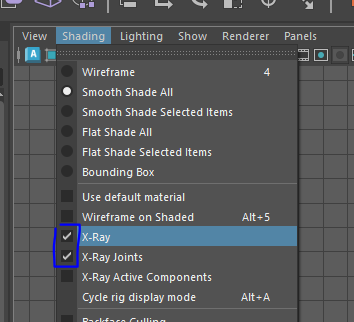
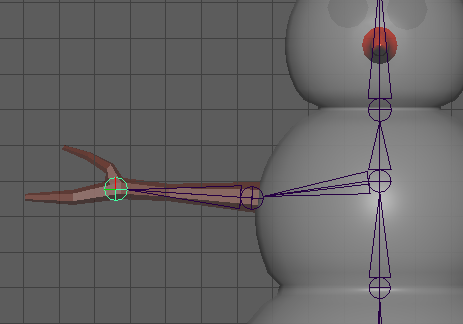
Turn on x-ray joints (HINT: shading > x-ray joints)
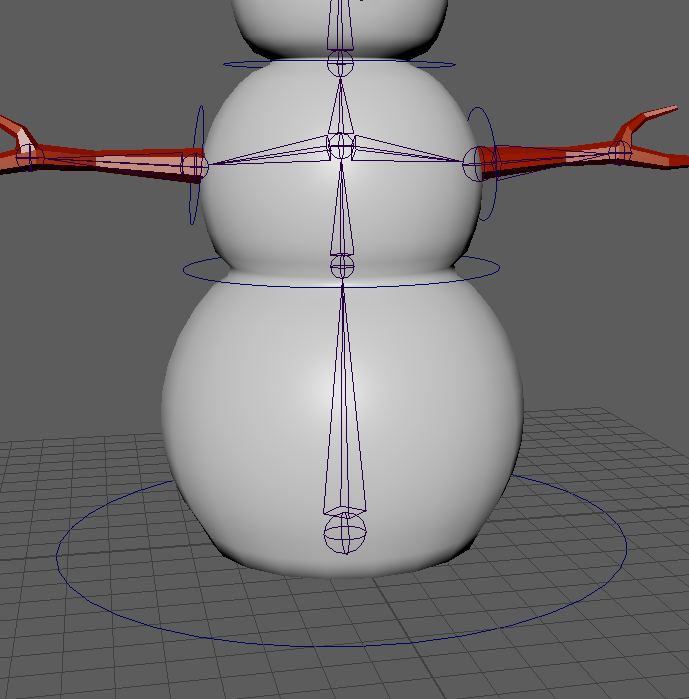
Orbit around the snowman to check that all the joints look like they are in the centre of the snowman and its arms.
If they are not you can select individual joints in the Outliner, and then press w to move them. This will move the entire joint chain, if you just want to move one joint press d
The last thing that is important to do is reset the rotation or all the joints.
![]()
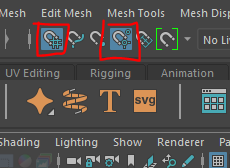
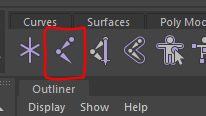
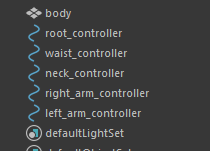
To make the skeleton easier to animate we add controllers.
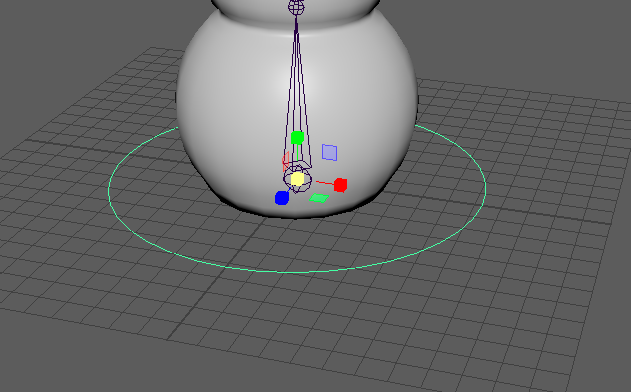
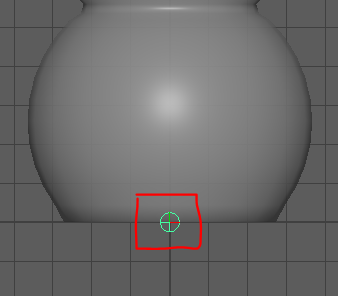
Create 2 more circles, move and scale them so they sit around the waist joint and the neck joint.
Create 2 more circles, rotate, scale and move them so they sit around the shoulder joints
![]()
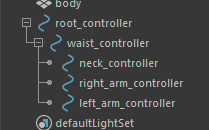
Now that we have all the joints and controllers created, we can bind them together so that the controllers control the joints.
We want the root controller to control position and rotation of the entire skeleton.
If you now move or rotate the root controller, the whole skeleton will move. If you try this make sure you reset the position back to its original position before you continue.
For the other joints we are just going to use the controllers to control the orientation.
Now you can do the same thing for the other 3 controllers.
You can now controll the entire skeleton by just using the controllers.
For this example we will just create these few, but I hope you can see that on a more complex skeleton we could create many more controller ( fingers, legs etc)
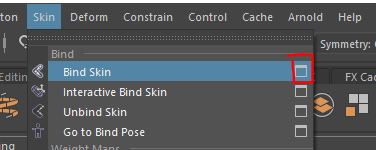
Now we get to the best bit, we attach the skeleton to the mesh in a proccess call Skinning
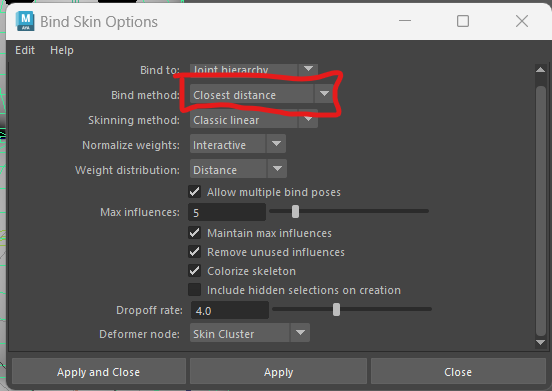
Depending on the shape of the character you are rigging, you may want to experiment with these options for the best result.
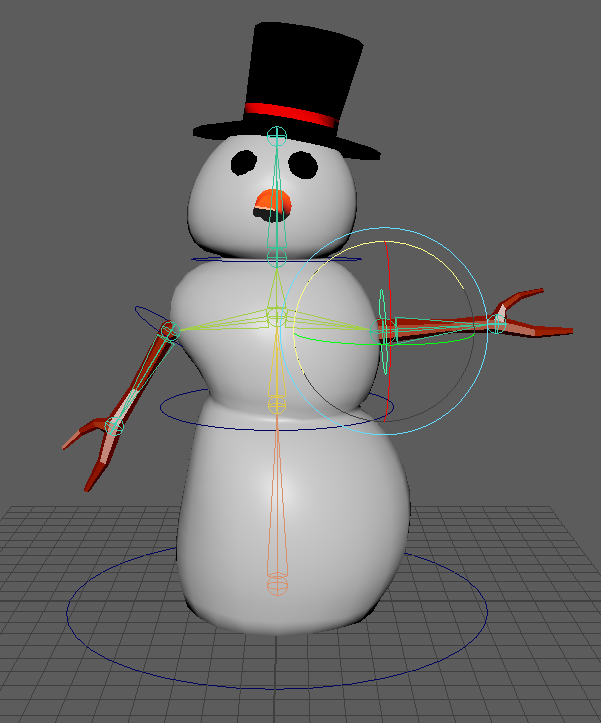
The skeleton will now be bound to the character.
You may notice that when you rotate the arms down, the body and face are effected.
When Maya binds the mesh to the skeleton, it uses the bind method to determine which areas of the mesh are influenced by each joint.
We can experiment with different bind methods to try to improve the result.
We can unbind the skin and try again.
First undo until the snowman is back at their original position.
With the snowman selected, go to the top menu and choose Skin > Unbind Skin
We can now re bind the skin with a different method.
You can now test you rig again by rotating the controllers. It doesn't need to be perfect but you want to get it as good as you can. In the next worksheet I will show you how we can refine the binding using weight painting.
But for now, we will move on.
You may have noticed that the hat and eyes don't stick to the head.
Make sure the head is back in the correct place.
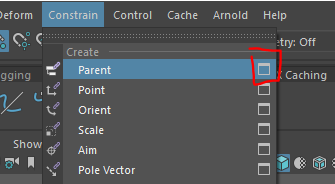
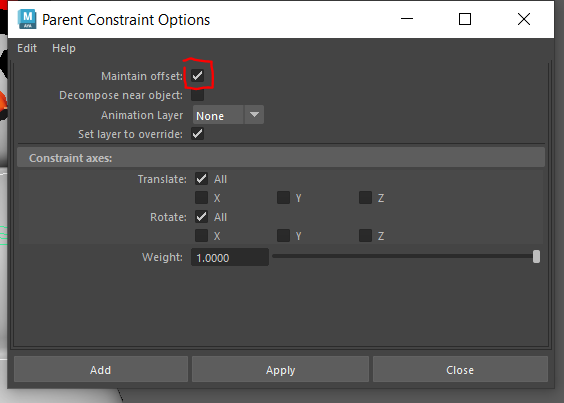
Select the neck_controller then hold ctrl and select the hat (doing it in this order is important).
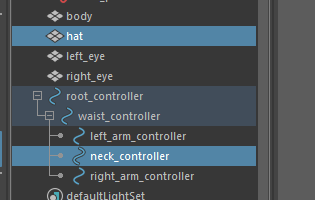
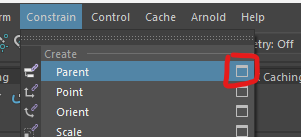
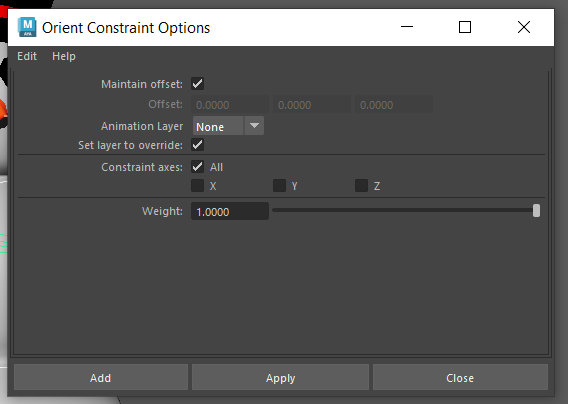
Check that the box that says "maintain offset" is ticked
Press apply
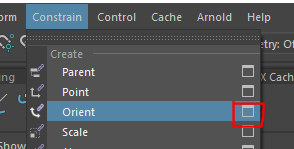
You can now do the same for the eyes, one at a time, parenting them to the neck controller.
If you now rotate the neck controller, the eyes and hat should stick to the head.
You could use the same method to parent objects to the snowmans hand.
We have now created a functional rig for a character, the controllers can now be keyframed to animate.
Create a simple animation with your snowman character. Make it